
How to use Gmail to check and send Cpanel Emails
In our last blog post we talked about how to setup Cpanel Emails. In this tutorial we will show you how to check and send from the new cpanel email address you created inside your gmail account. This is the way we use our cpanel emails as we check our personal Gmails all the time and we are then able to check and send from our business account emails while still keeping them semi separated. After you have set this up correctly you will be able to receive email that is tagged so you know exactly which email it came from, you will be able to reply from the correct email, and you will be able to send emails from either your personal gmail address or any of your business addresses you may have set up.
This is a super handy way to use your free emails and it allows you to use all of the great features of Gmail as well as being able to quickly check all emails on your phone from the gmail app. The only drawbacks I have seen is that in some instances gmail does not bring in your emails immediately though you can force check them in your Gmail “Accounts and Import” Settings. The tutorial is in the video above but is also in the post below if you don’t want to watch a video.
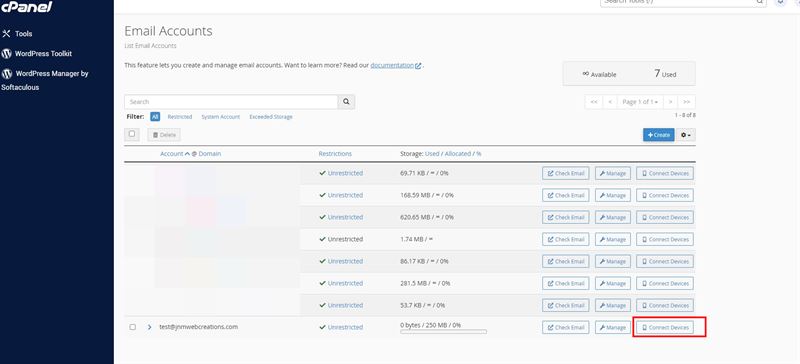
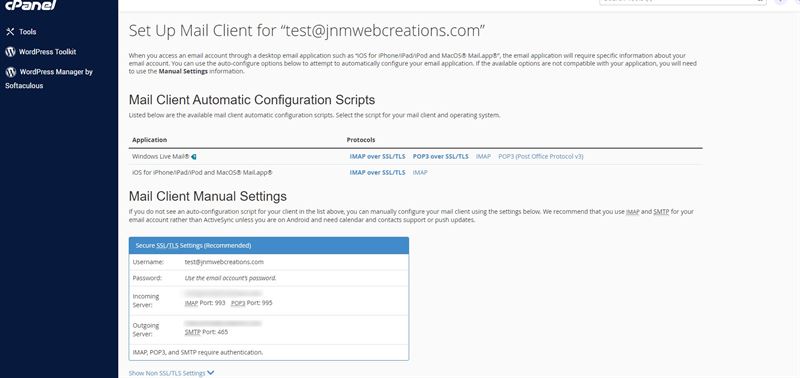
1. We first want to get our mail client settings from our Cpanel dashboard. We can first go to our email accounts in Cpanel and then press “Connect Devices” at this point the next page will show us all the info we need except the password which you either need to remember from your cpanel email setup or reset the password in Manage.
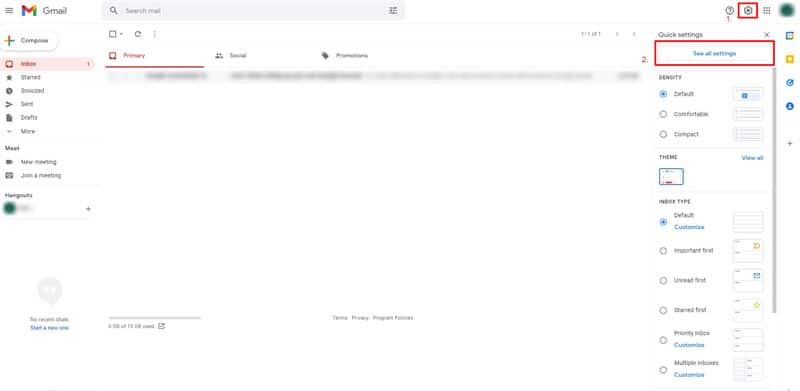
2. At this point we want to go back into our gmail account. This should be just a standard gmail email (it may work with Gsuite business emails though I haven’t tried). On the top right side you will want to press on the gear icon. After you have done that a sidebar will slide out and you will press on see all settings as we see below.
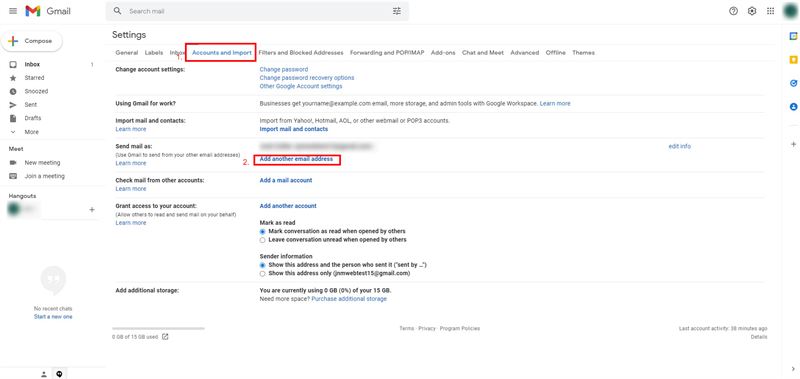
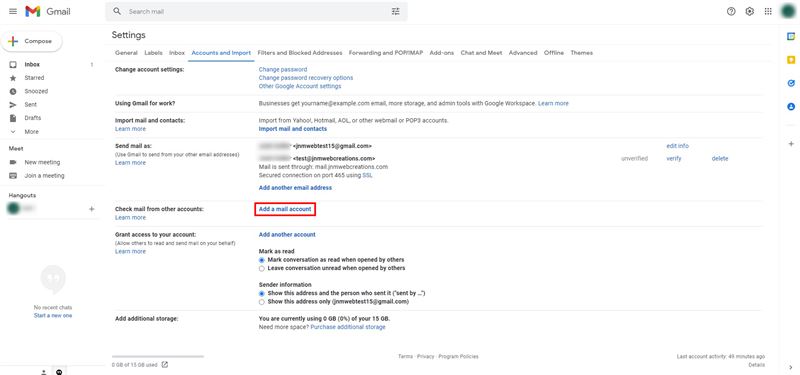
3. When you get to the settings page click on the “Accounts and Import” top tab and then go to “Add another email address” next to “Send Mail as” and under your gmail address.
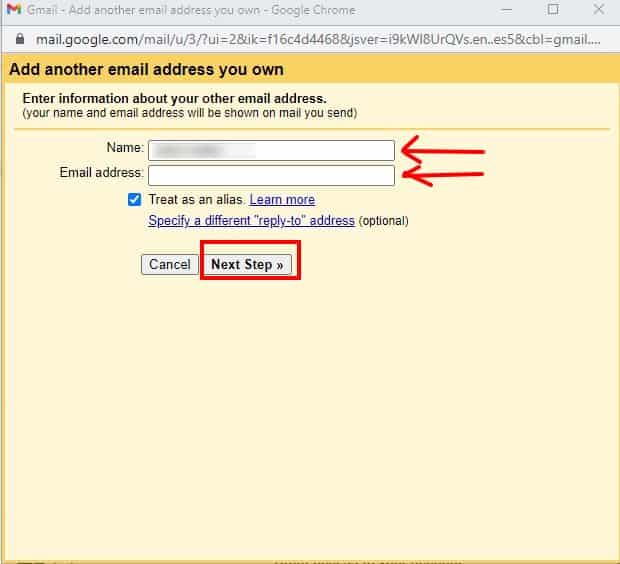
4. A yellowish popup window will popup. Make sure not to close it and if your browser tries to block it you will have to allow it. You will then have to fill in the name which is what you want this email address to be named when you send emails to other people using it. The email address is just cpanel email address that you have created in cpanel. Then press next step.
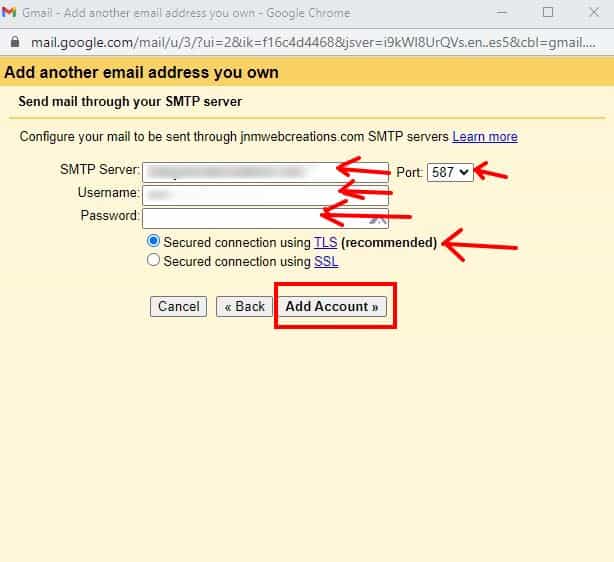
5. The next page will be the place where you will put in the mail settings you had gotten from the Cpanel “Connect Devices” button. You will need to add the SMTP Server, the SMTP port, the username (cpanel email address), the email password you created and then just use the recommended type of connection (if you have an issue you may just try the other option). Then click Add Account.
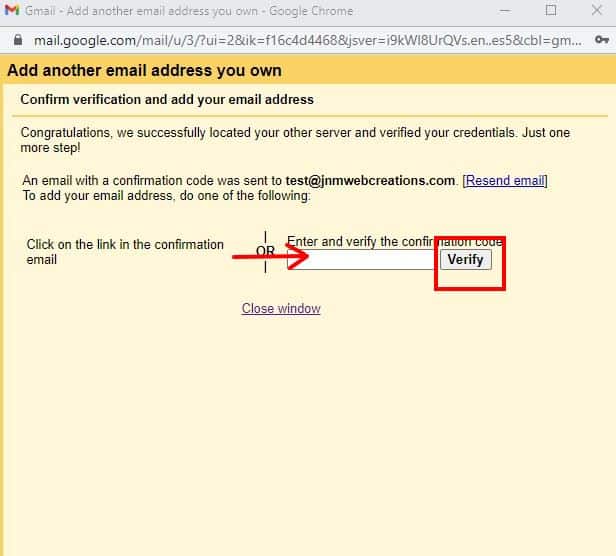
6. You will then go to another page that will ask for a confirmation code. Gmail will have sent the code to your Cpanel email so you will have to go check your email with Roundcube or Horde and get that code. Enter it and press Verify and the window will disappear.
7. At this point you will click the “Add a mail account” next to “Check mail from other accounts”. If you don’t do both steps you will be able to send, but you won’t be able to receive emails so you must add your account again at this point.
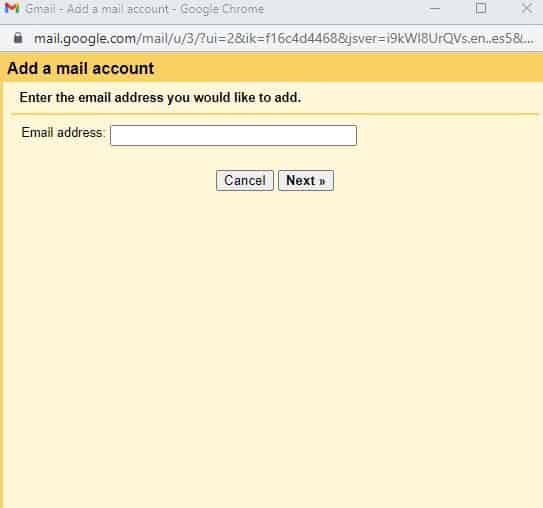
8. Another yellow window will popup. In this one you will put in the Cpanel email address and press next.
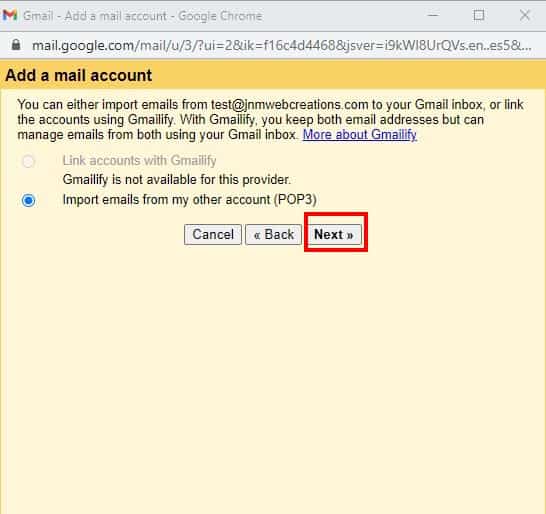
9. The next page is simple. It should just have “Import emails from my other account (POP3)” chosen then you press next.
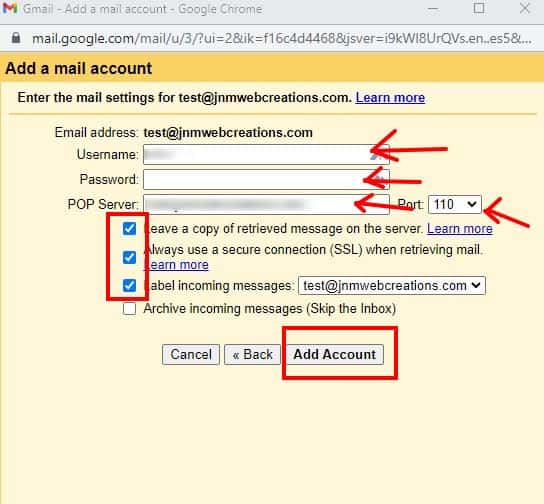
10. The last step to connect your account is to enter the username (Cpanel email address), the email password you created, the POP server URL and the POP3 port. I usually select the first 3 checkboxes. The first allows your emails to stay on your hosting cpanel server if you ever need to get them then you have a backup of everything sent to you but not really of what you sent as that is in gmail. You will always want a secure connection so just check that. I like to check the “Label incoming messages” as I like to be able to see what email the incoming email is coming from. If they have no label that is from your standard gmail account and if you have more than one alternate email address it will be labeled correctly. The last checkbox I leave unchecked as I like all emails to come to my inbox, but you can check it if you want them only to go to the new folder that is created for the email address that was connected. Then press Add Account and you are ready to go.
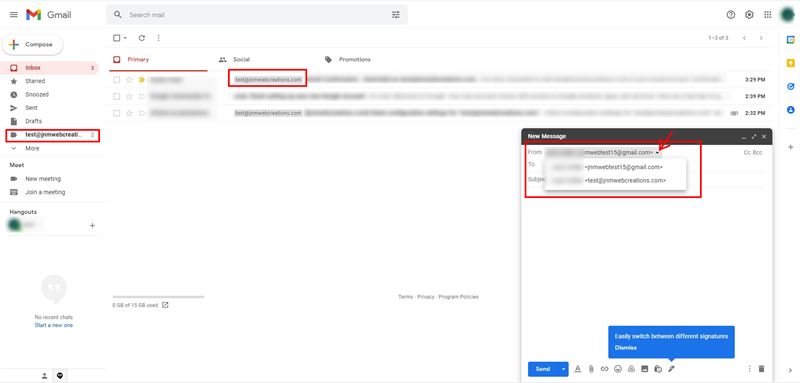
Now that you have gotten it all setup you can use your email just as you would any other Gmail email. The image below shows how the new email works in gmail. On the left you will see the new folder created for the new email address in the middle you will see the tag showing the gray with black font that tells you which address, the incoming email is from. On the right you will see the drop down to select what email address you want a new email to come from. If you don’t see the from just click closer to the top of the new message window and it will show you from and to boxes. The last thing is that you will be able just press reply and not worry what address you will reply from, it will come from the address that the email was sent to.
One last tip is if you know someone sent you an email, sometimes it takes a short time for emails to come through into your Gmail account, but you can force Gmail to check and see if there is any email. The way to do this is to go to the settings and “Accounts and Import” tab and go down to “Check mail from other accounts” then find the email address and press the “Check Mail Now” link and if it has gotten into your Cpanel Email account it should then be pulled by Gmail.
I hope this tutorial is helpful for you and saves you some time. The first time I did this I hadn’t found too much on it, but found 1 after some diligent searching. It took me a while to do it the first time as the tutorial wasn’t great, but now I can do it in just a few minutes. Let me know if you have any questions.


0 Comments